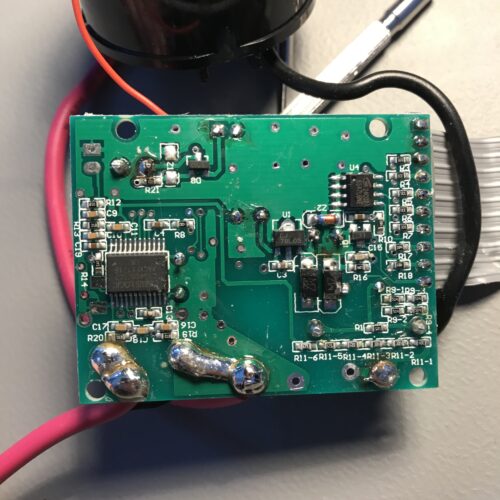
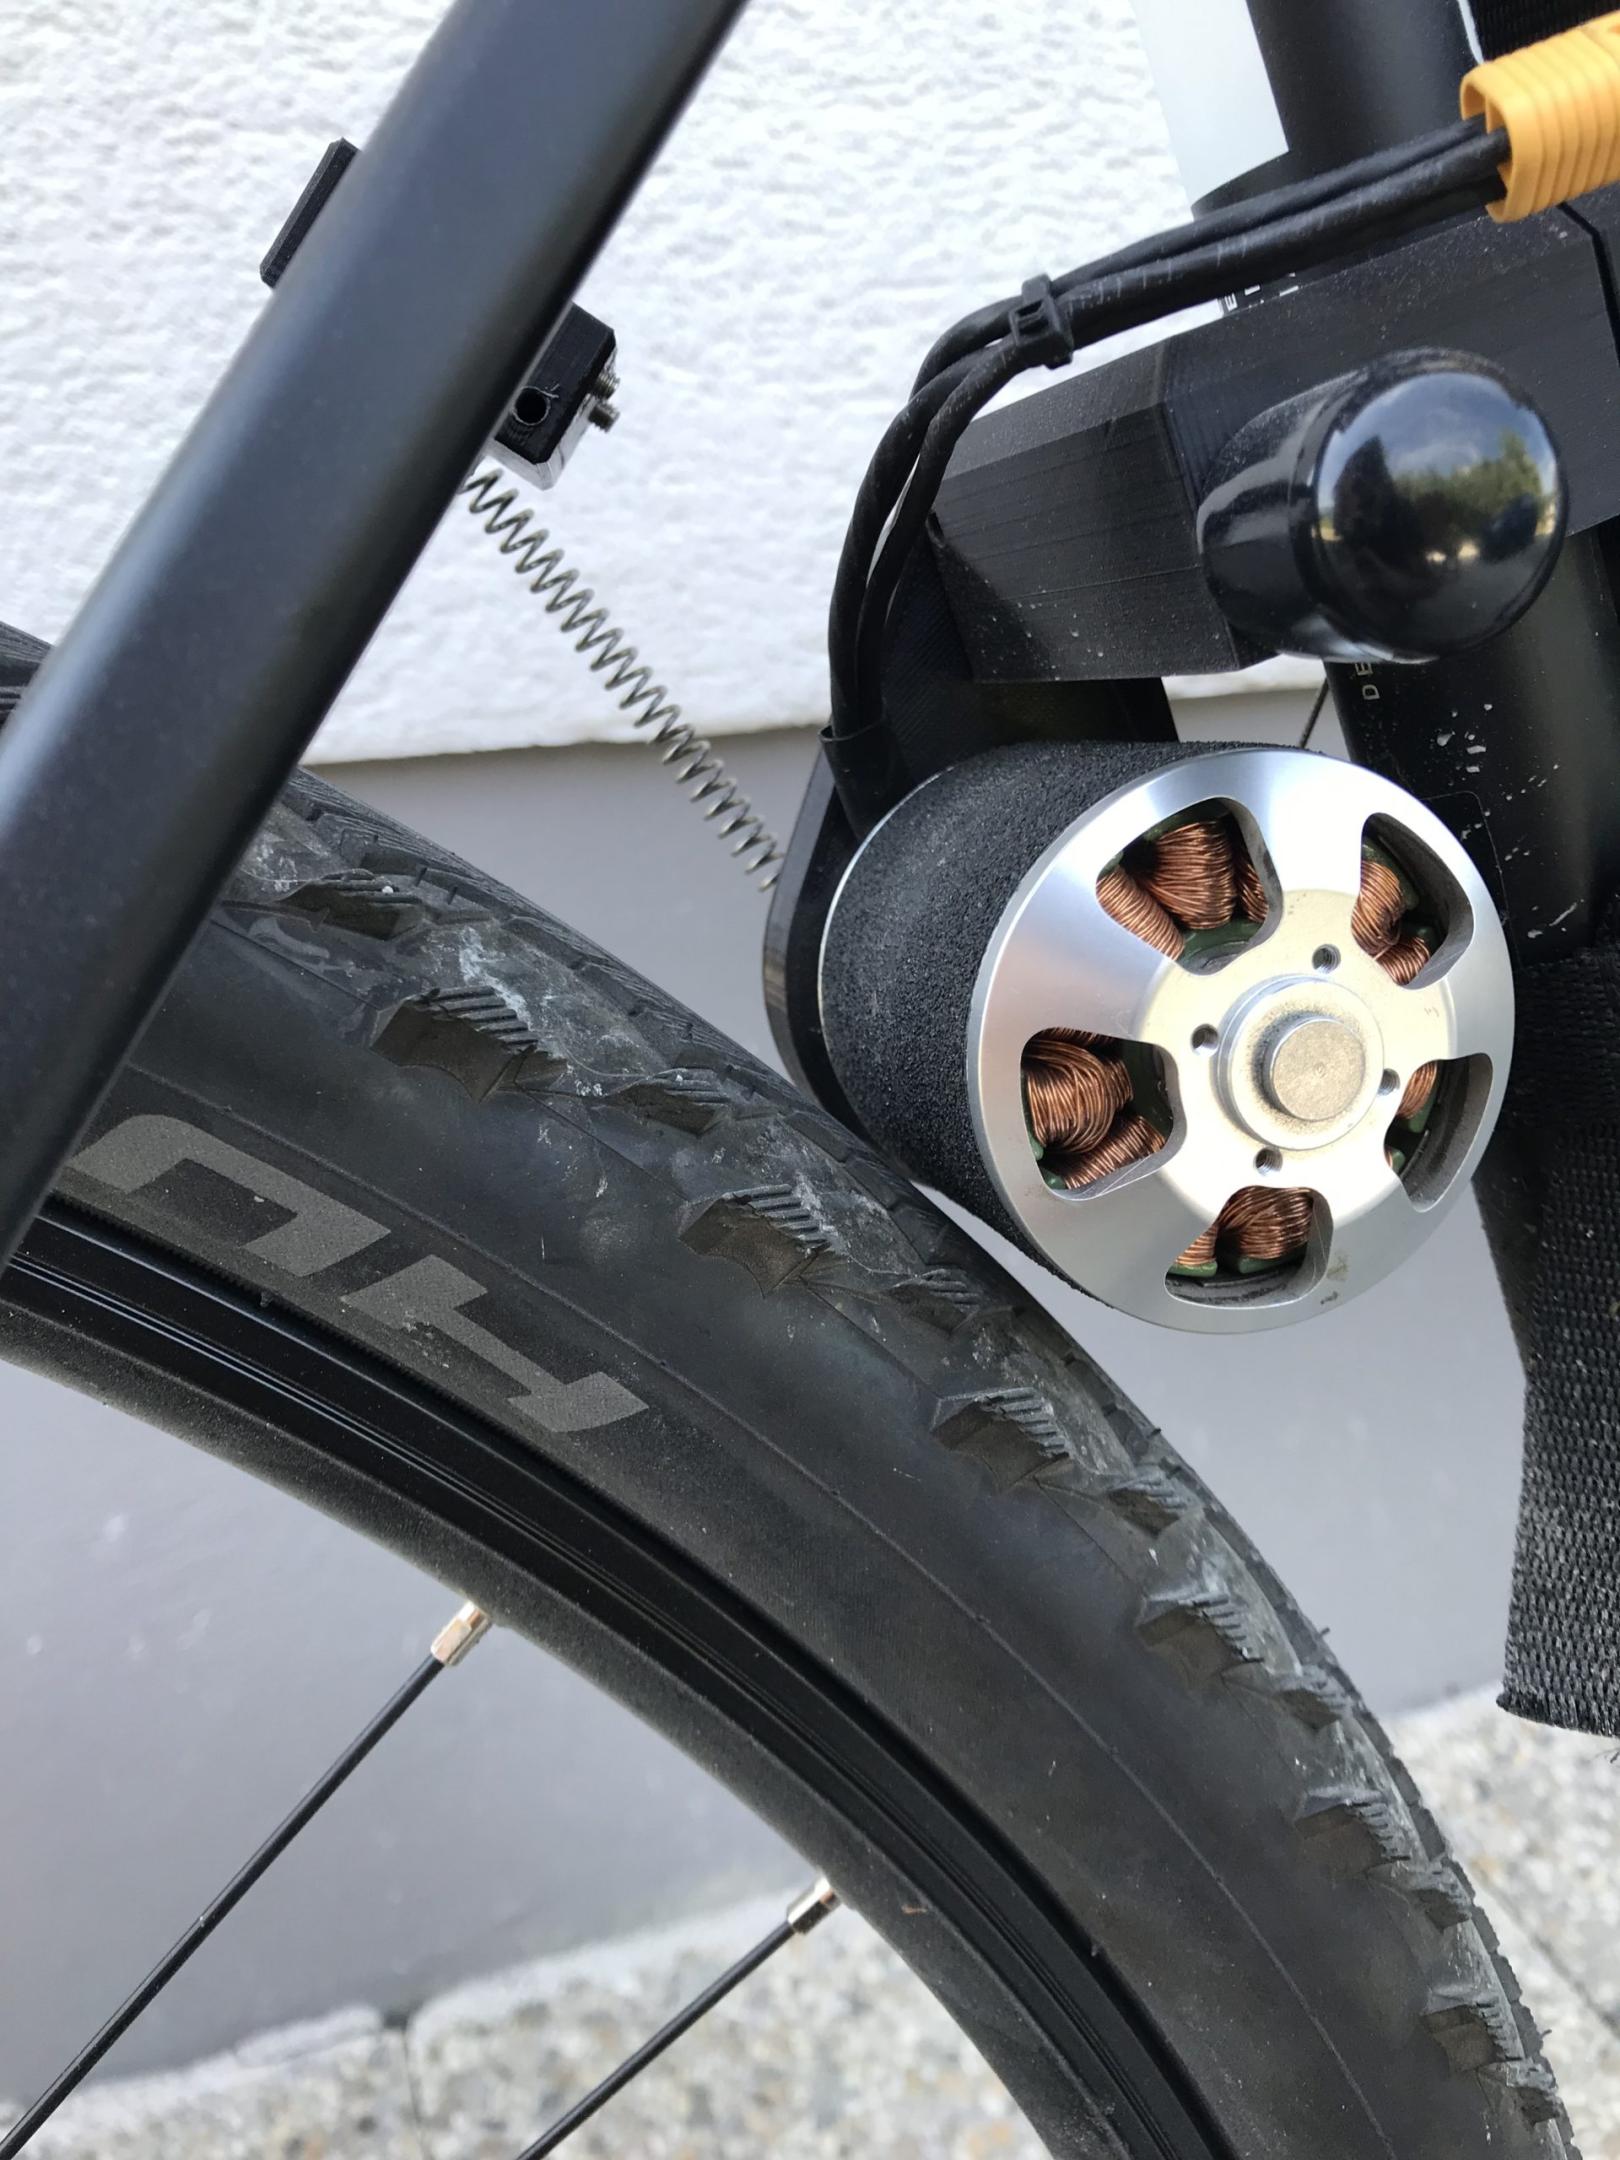
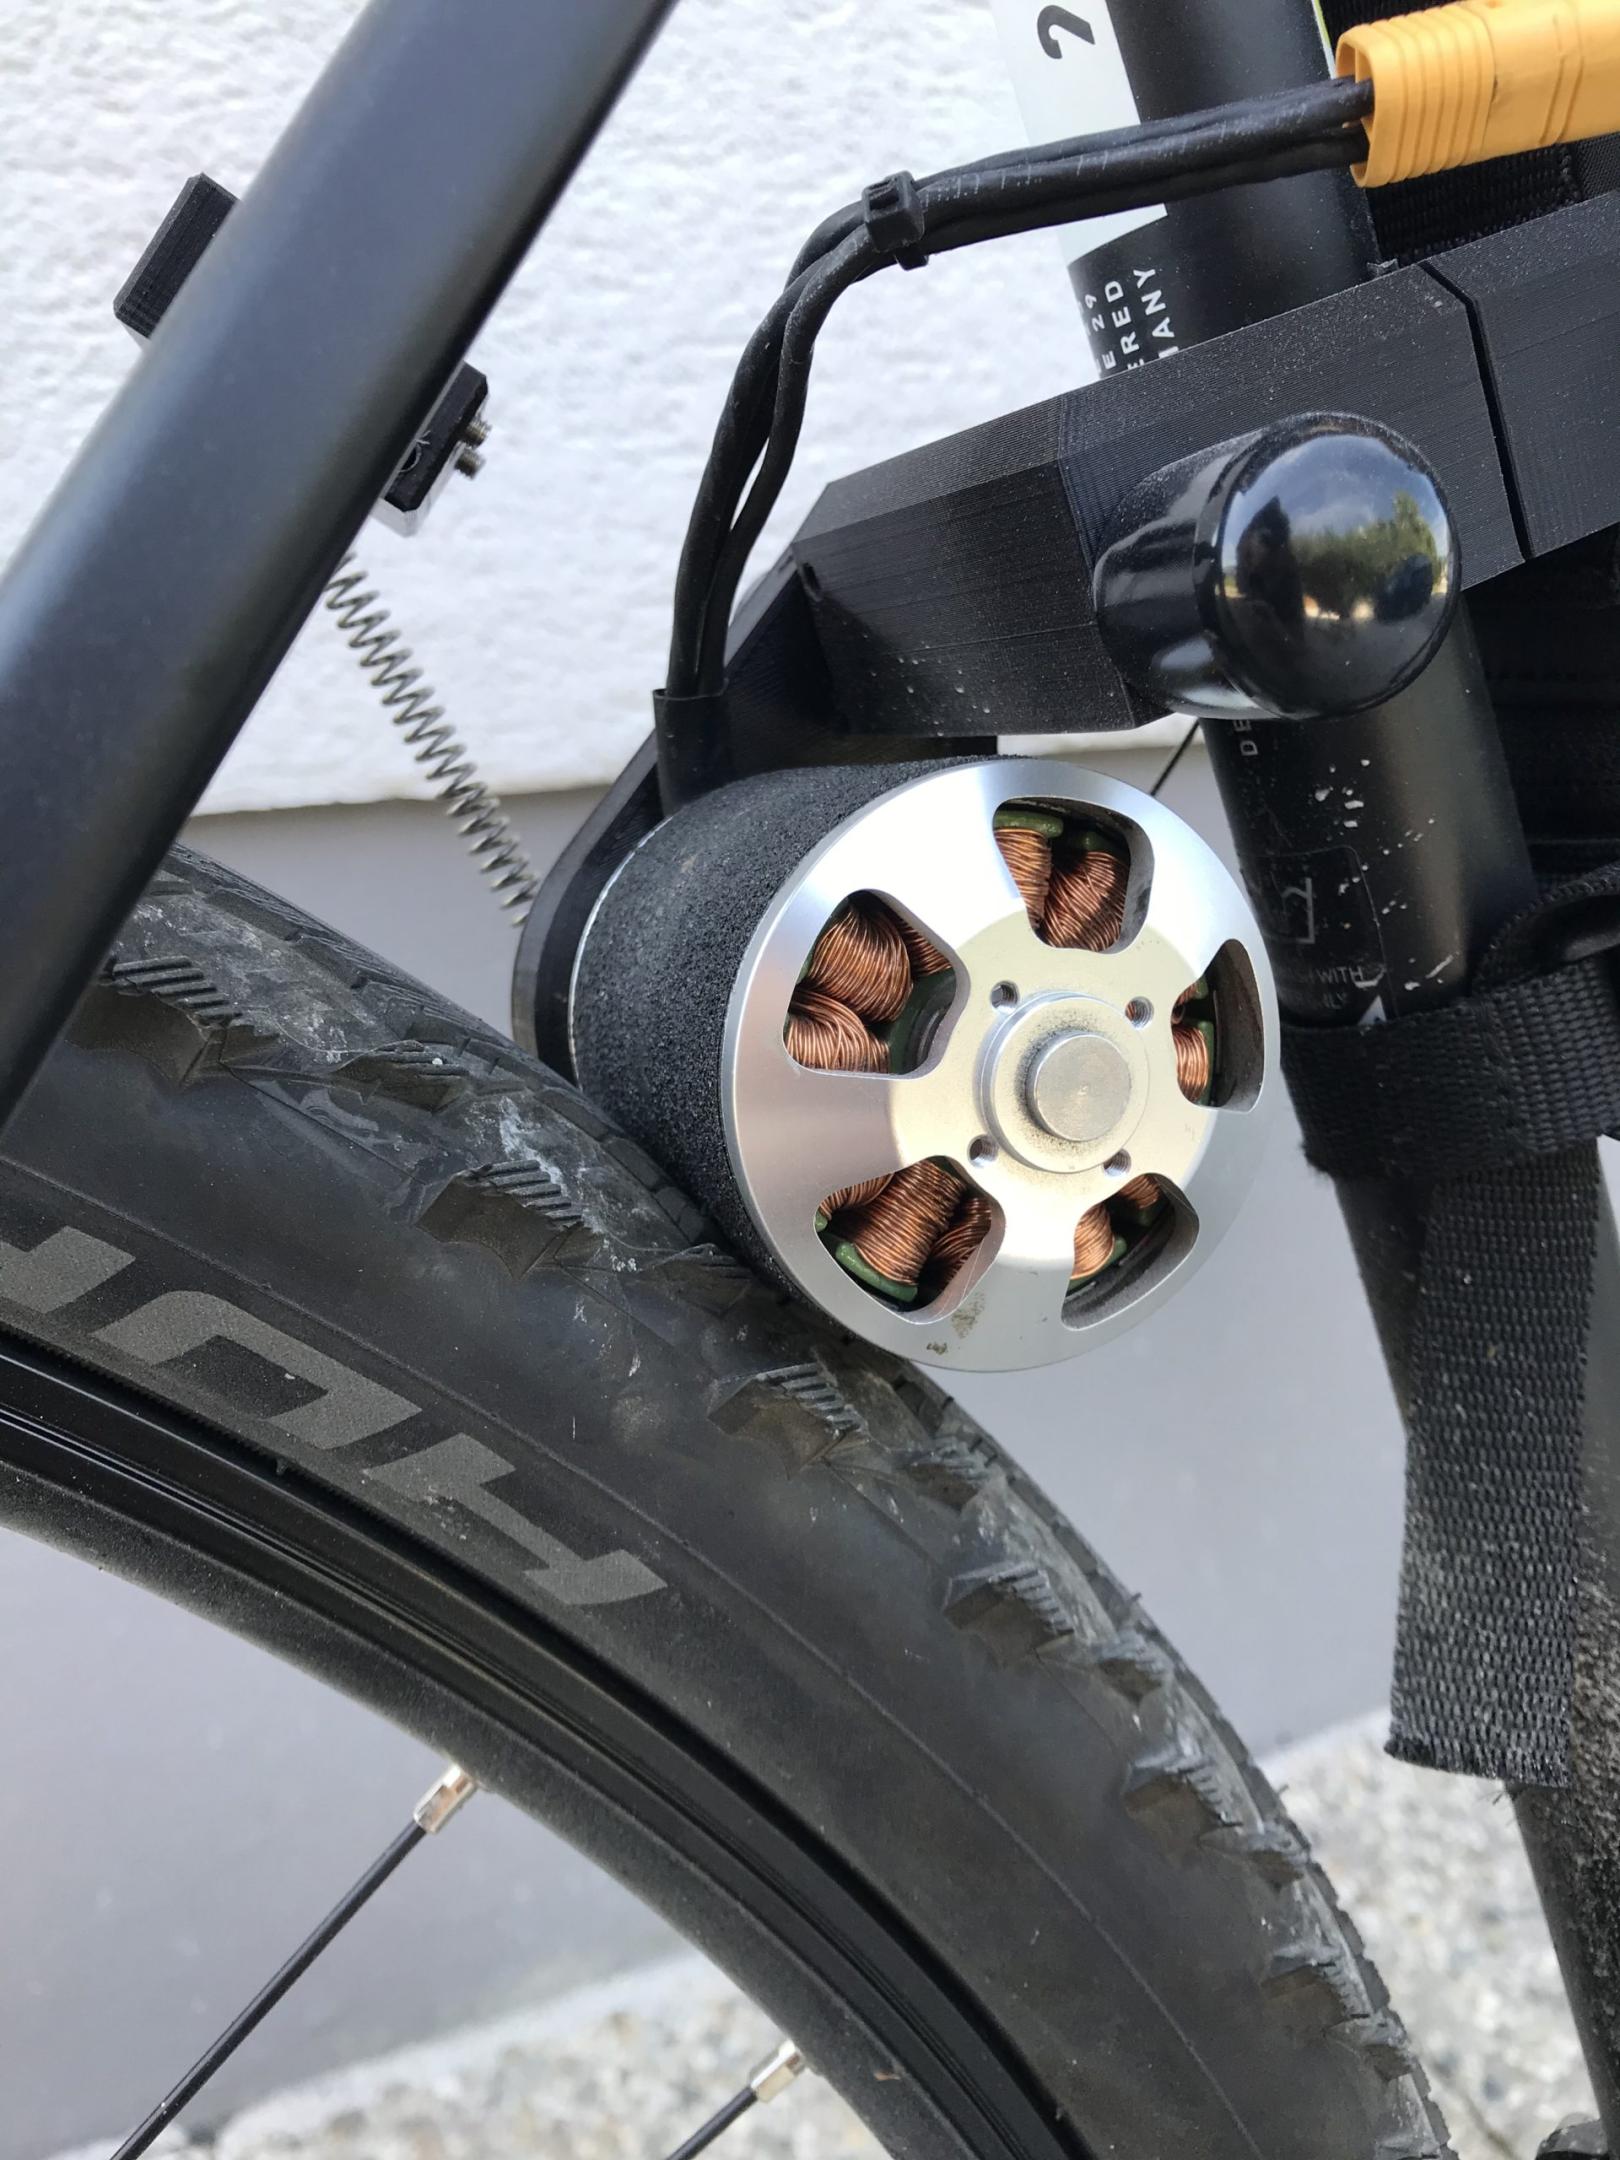
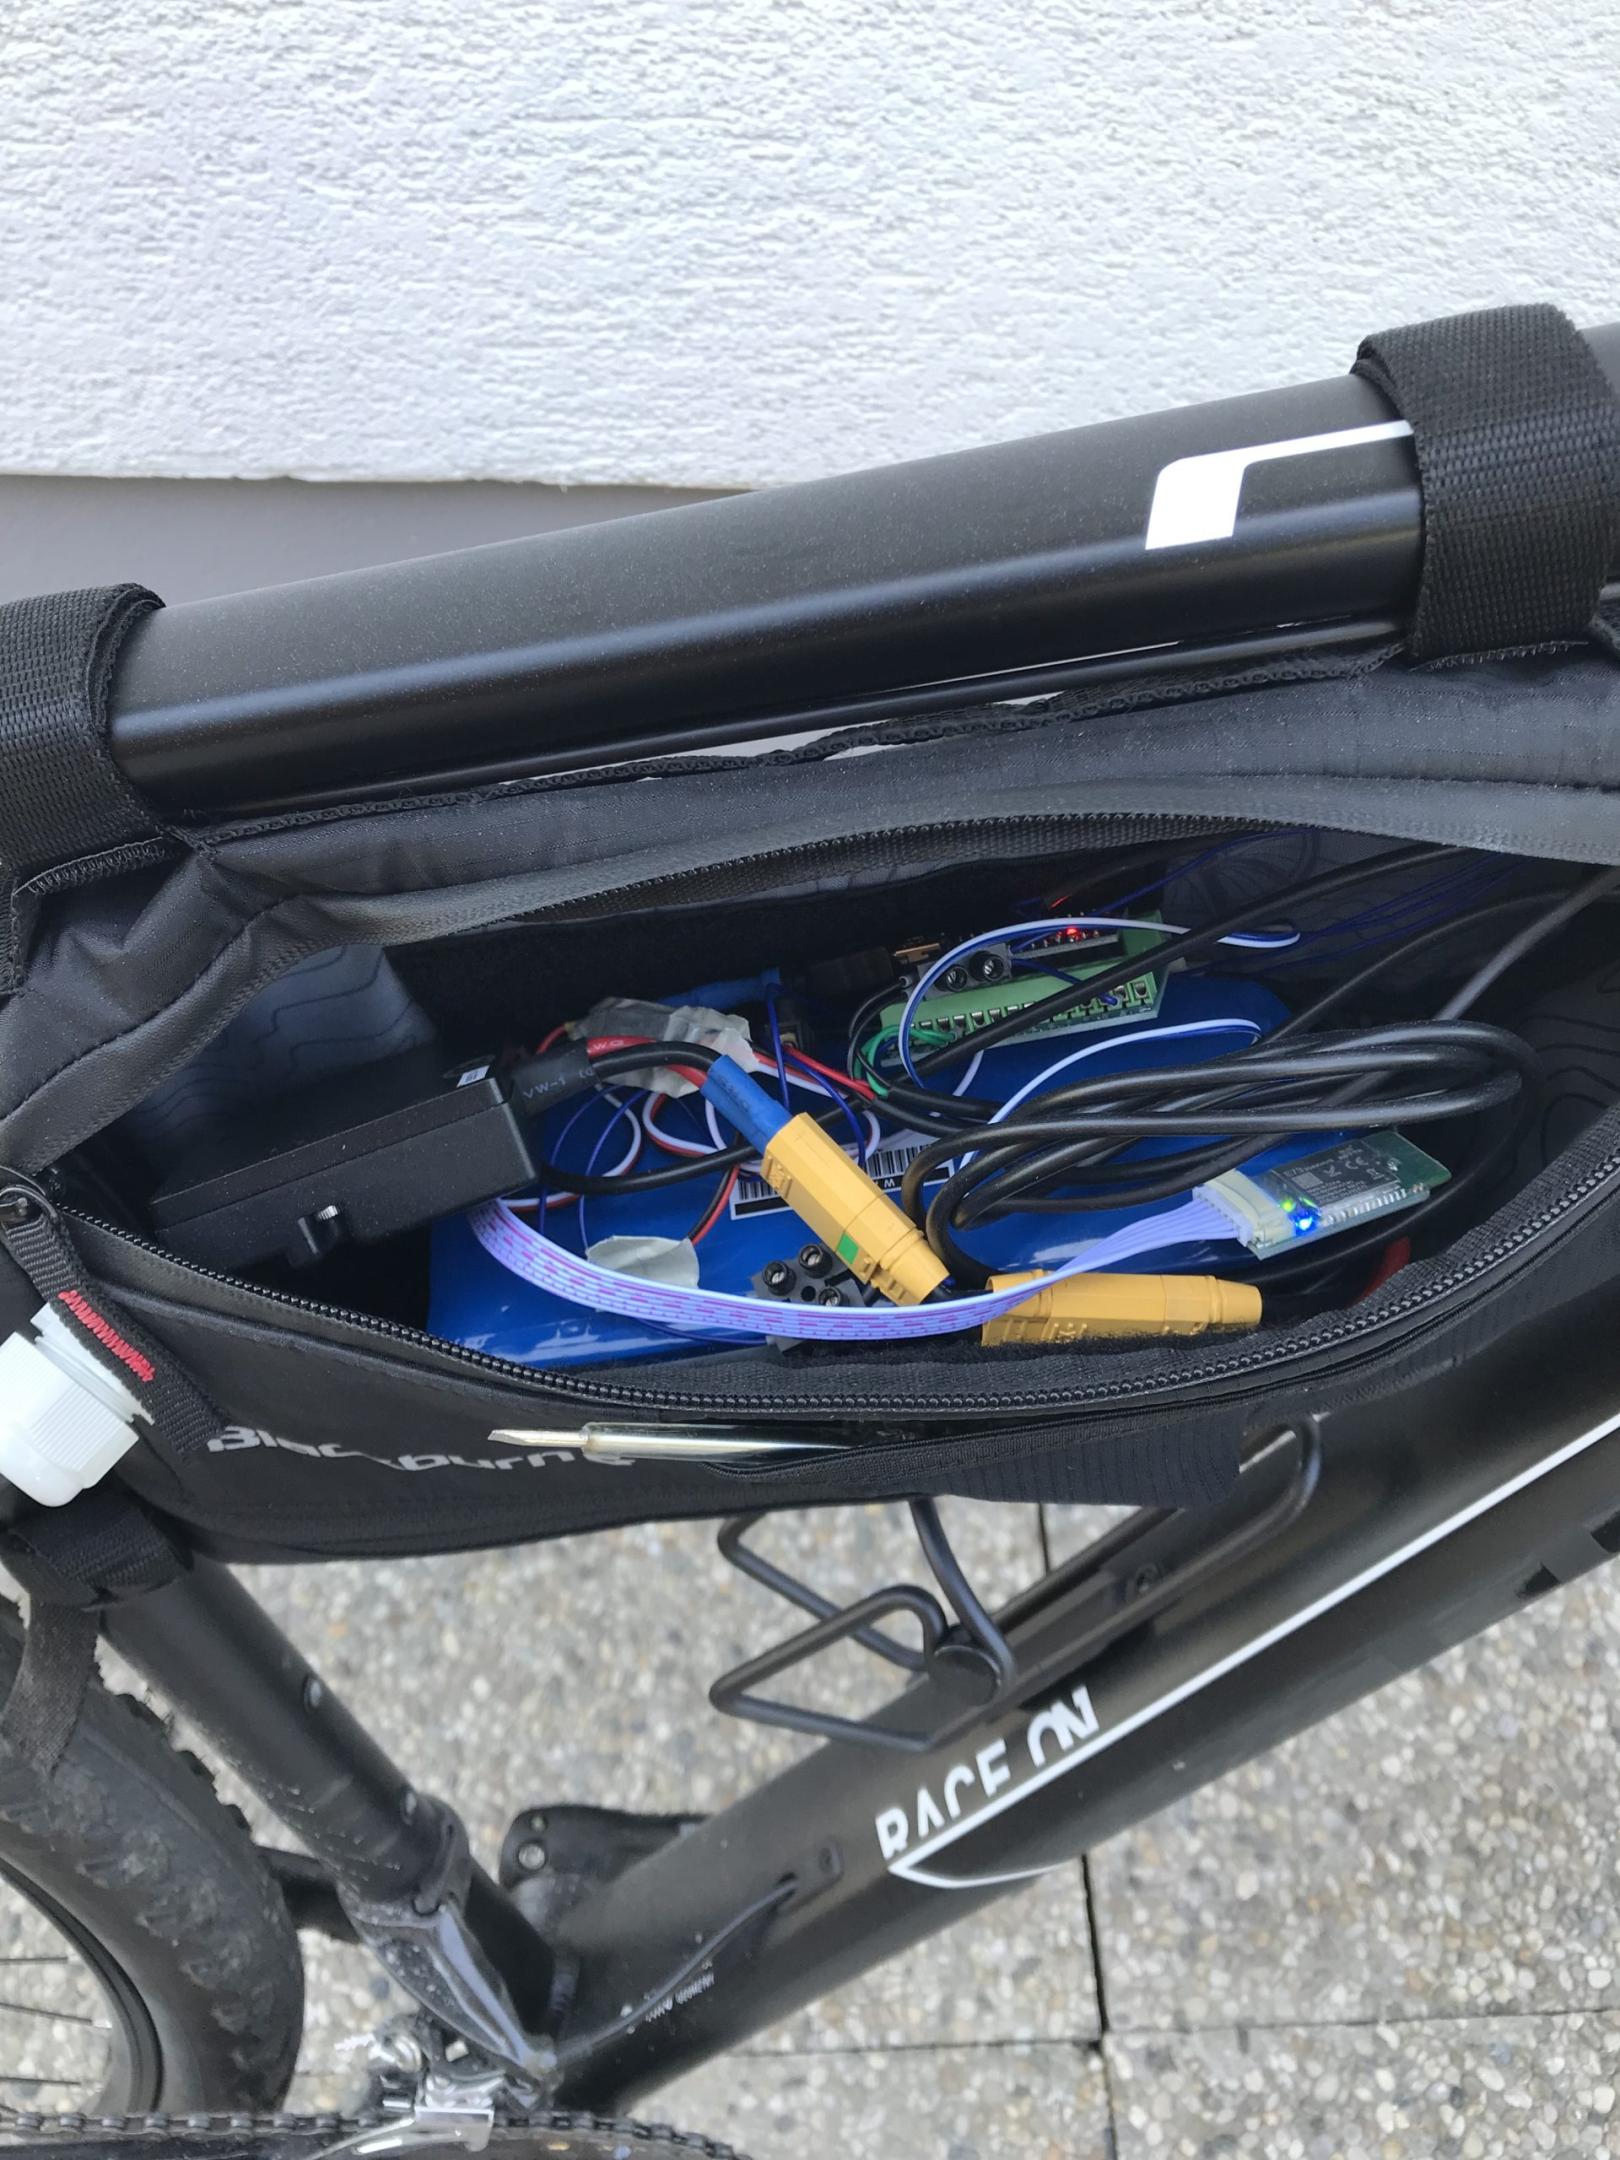
3D printed frictiondrive for bicycles using 6374 sized BLDC Motor and FOC Controller. Input to an Arduino Nano is given by a throttle and a braking sensor. The Arduino manages the incoming signals and communicates with the motorcontroller based on the sensor input. A speed sensor from an inexpensive bike computer mounted on the bicycle is tapped and fed into the Arduino as well. Using interrupts, the time between two voltage pulses can be measured and the current speed calculated. The motor support can therefore be disabled when reaching a certain speed.
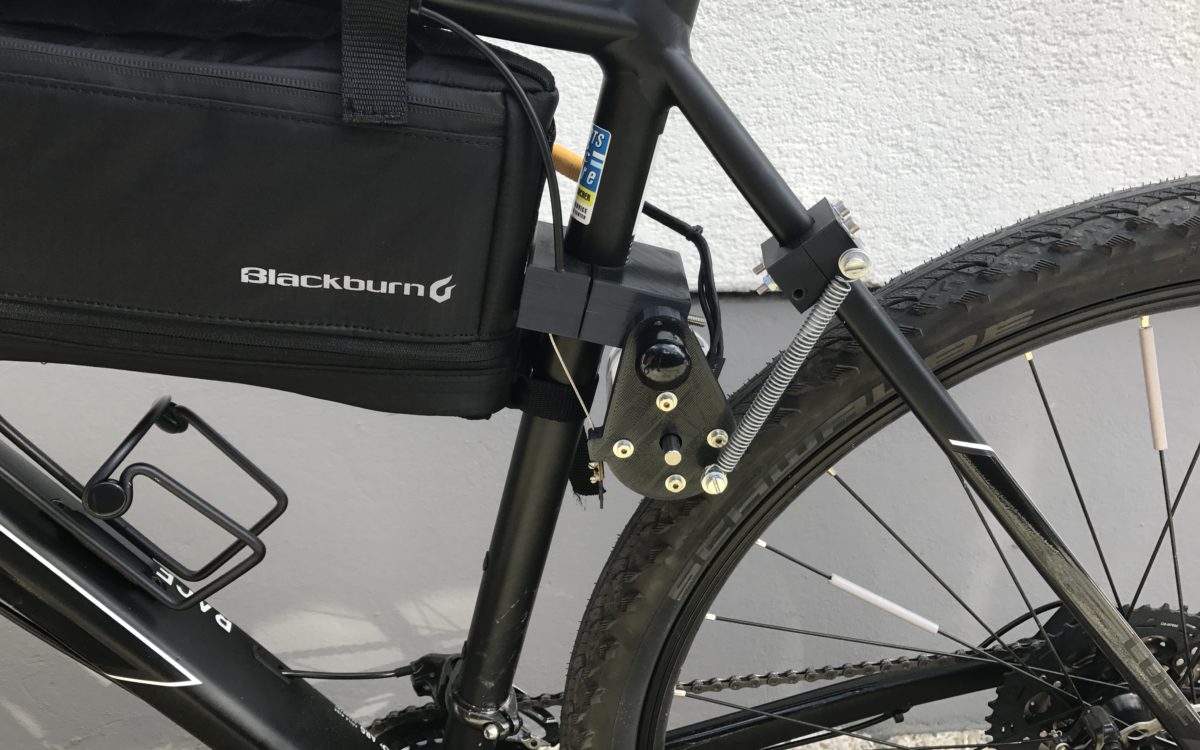
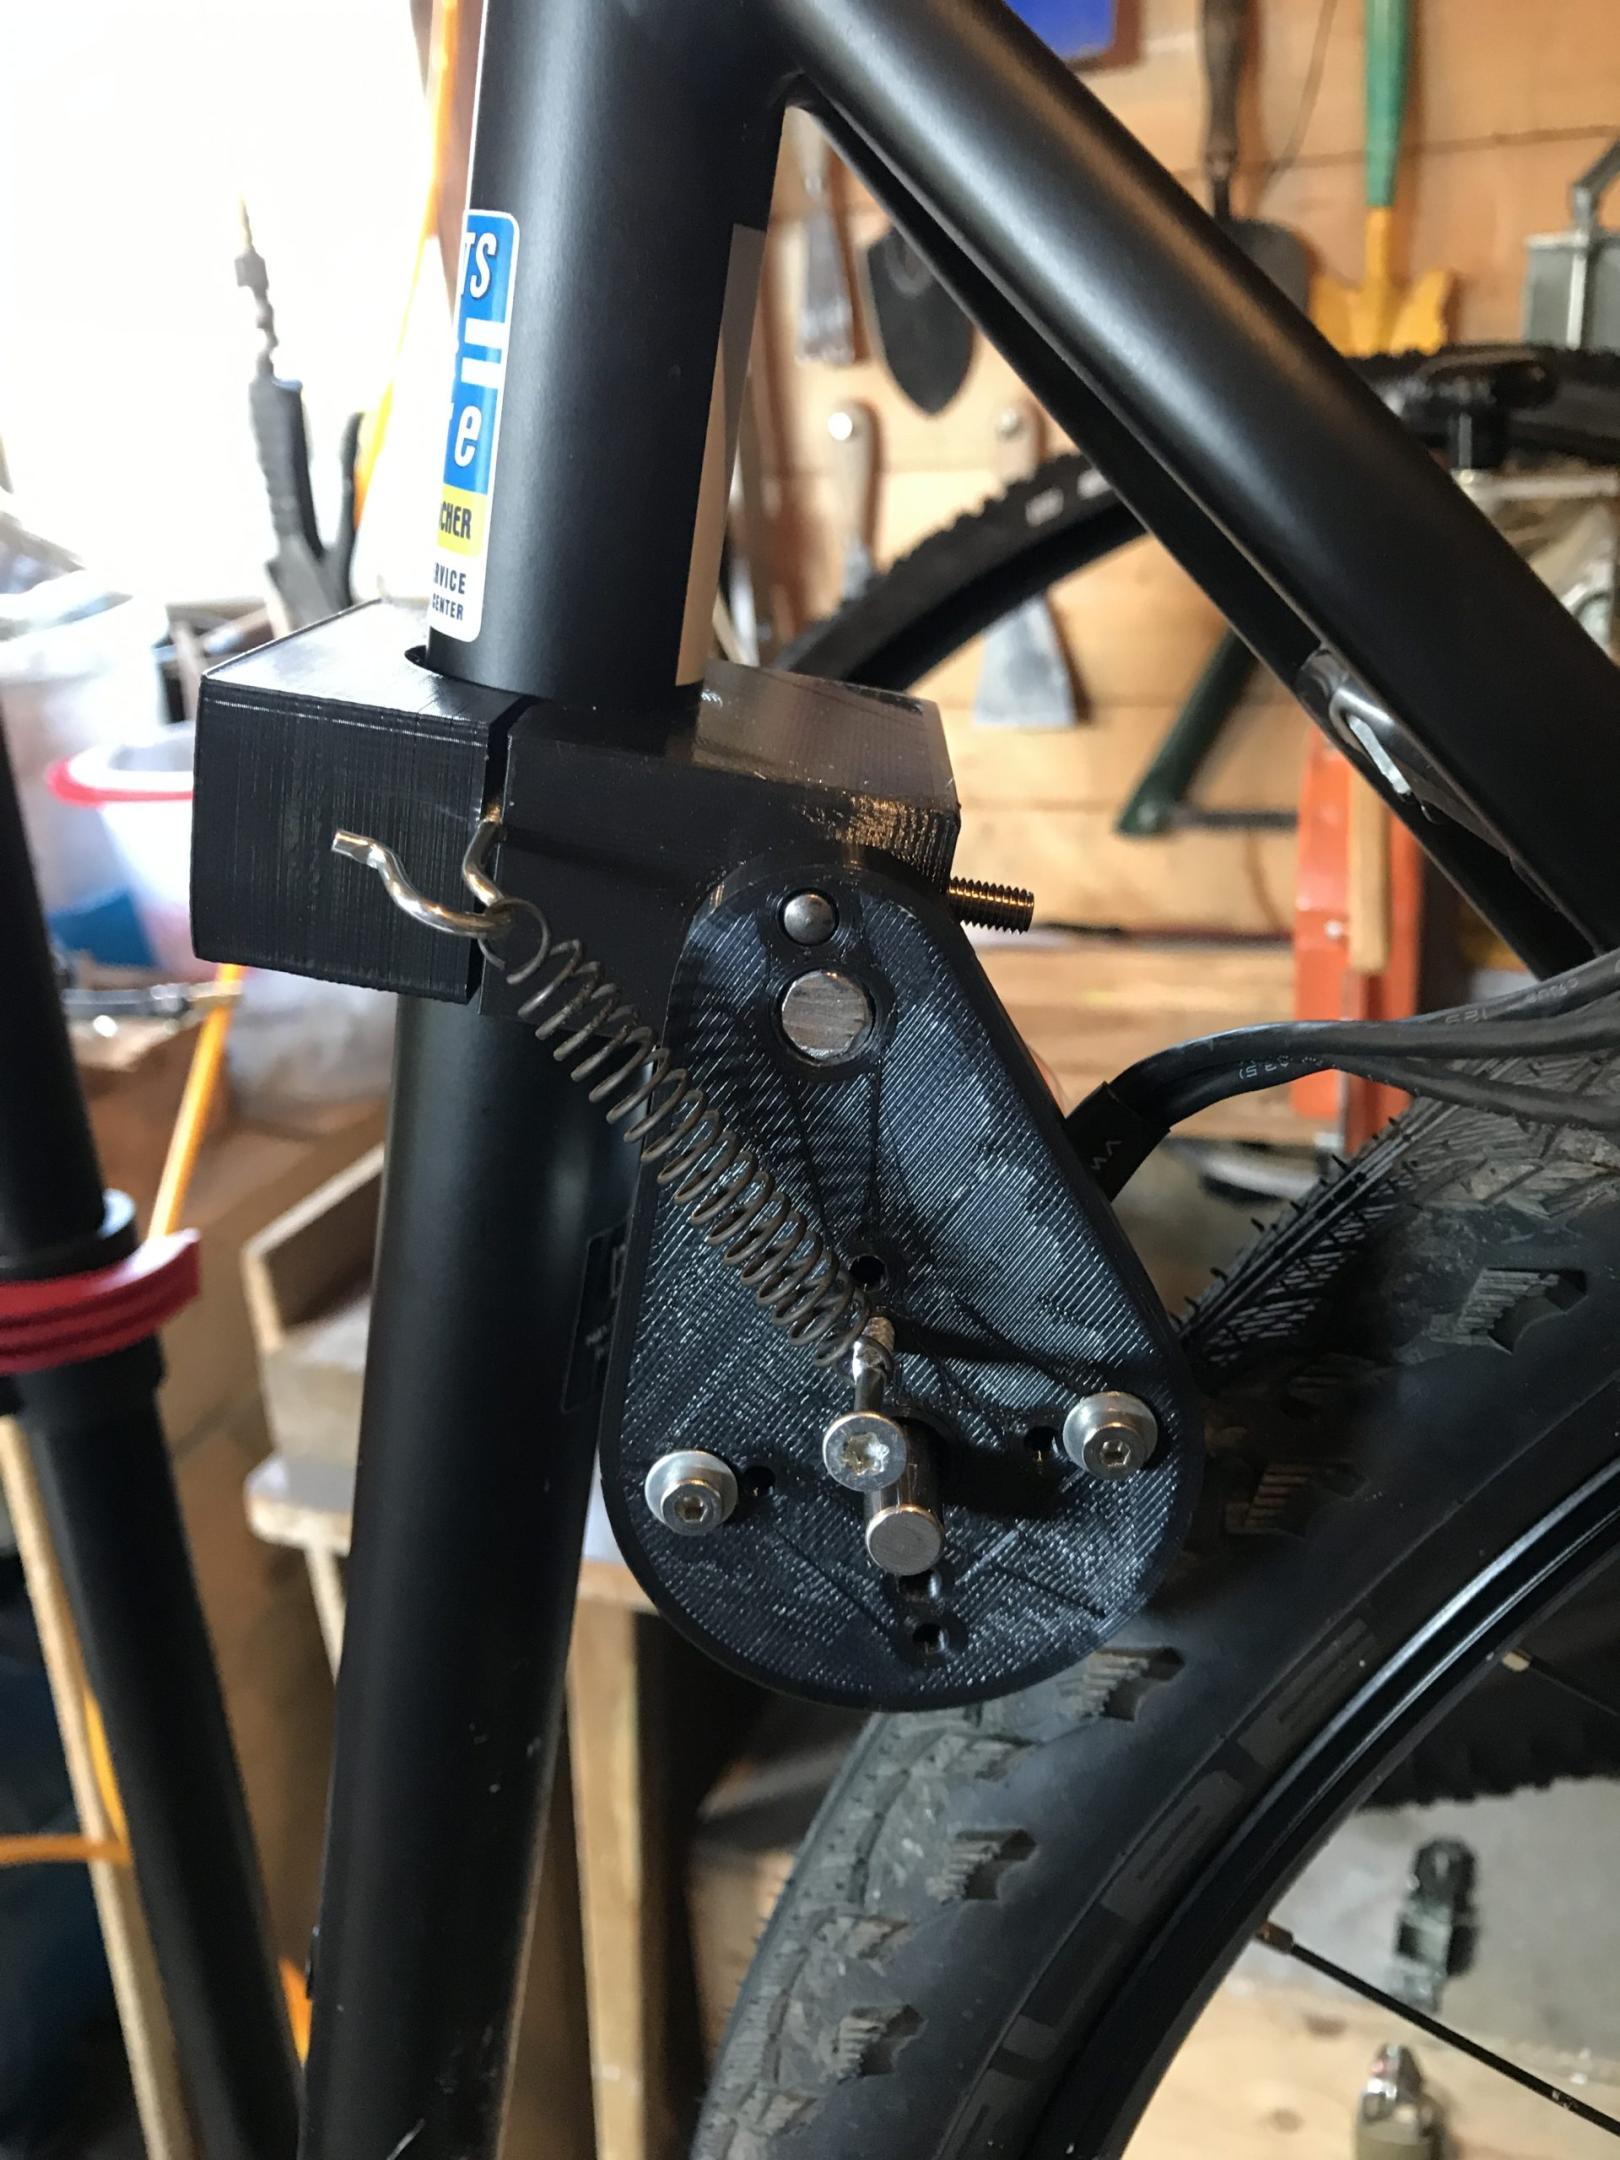
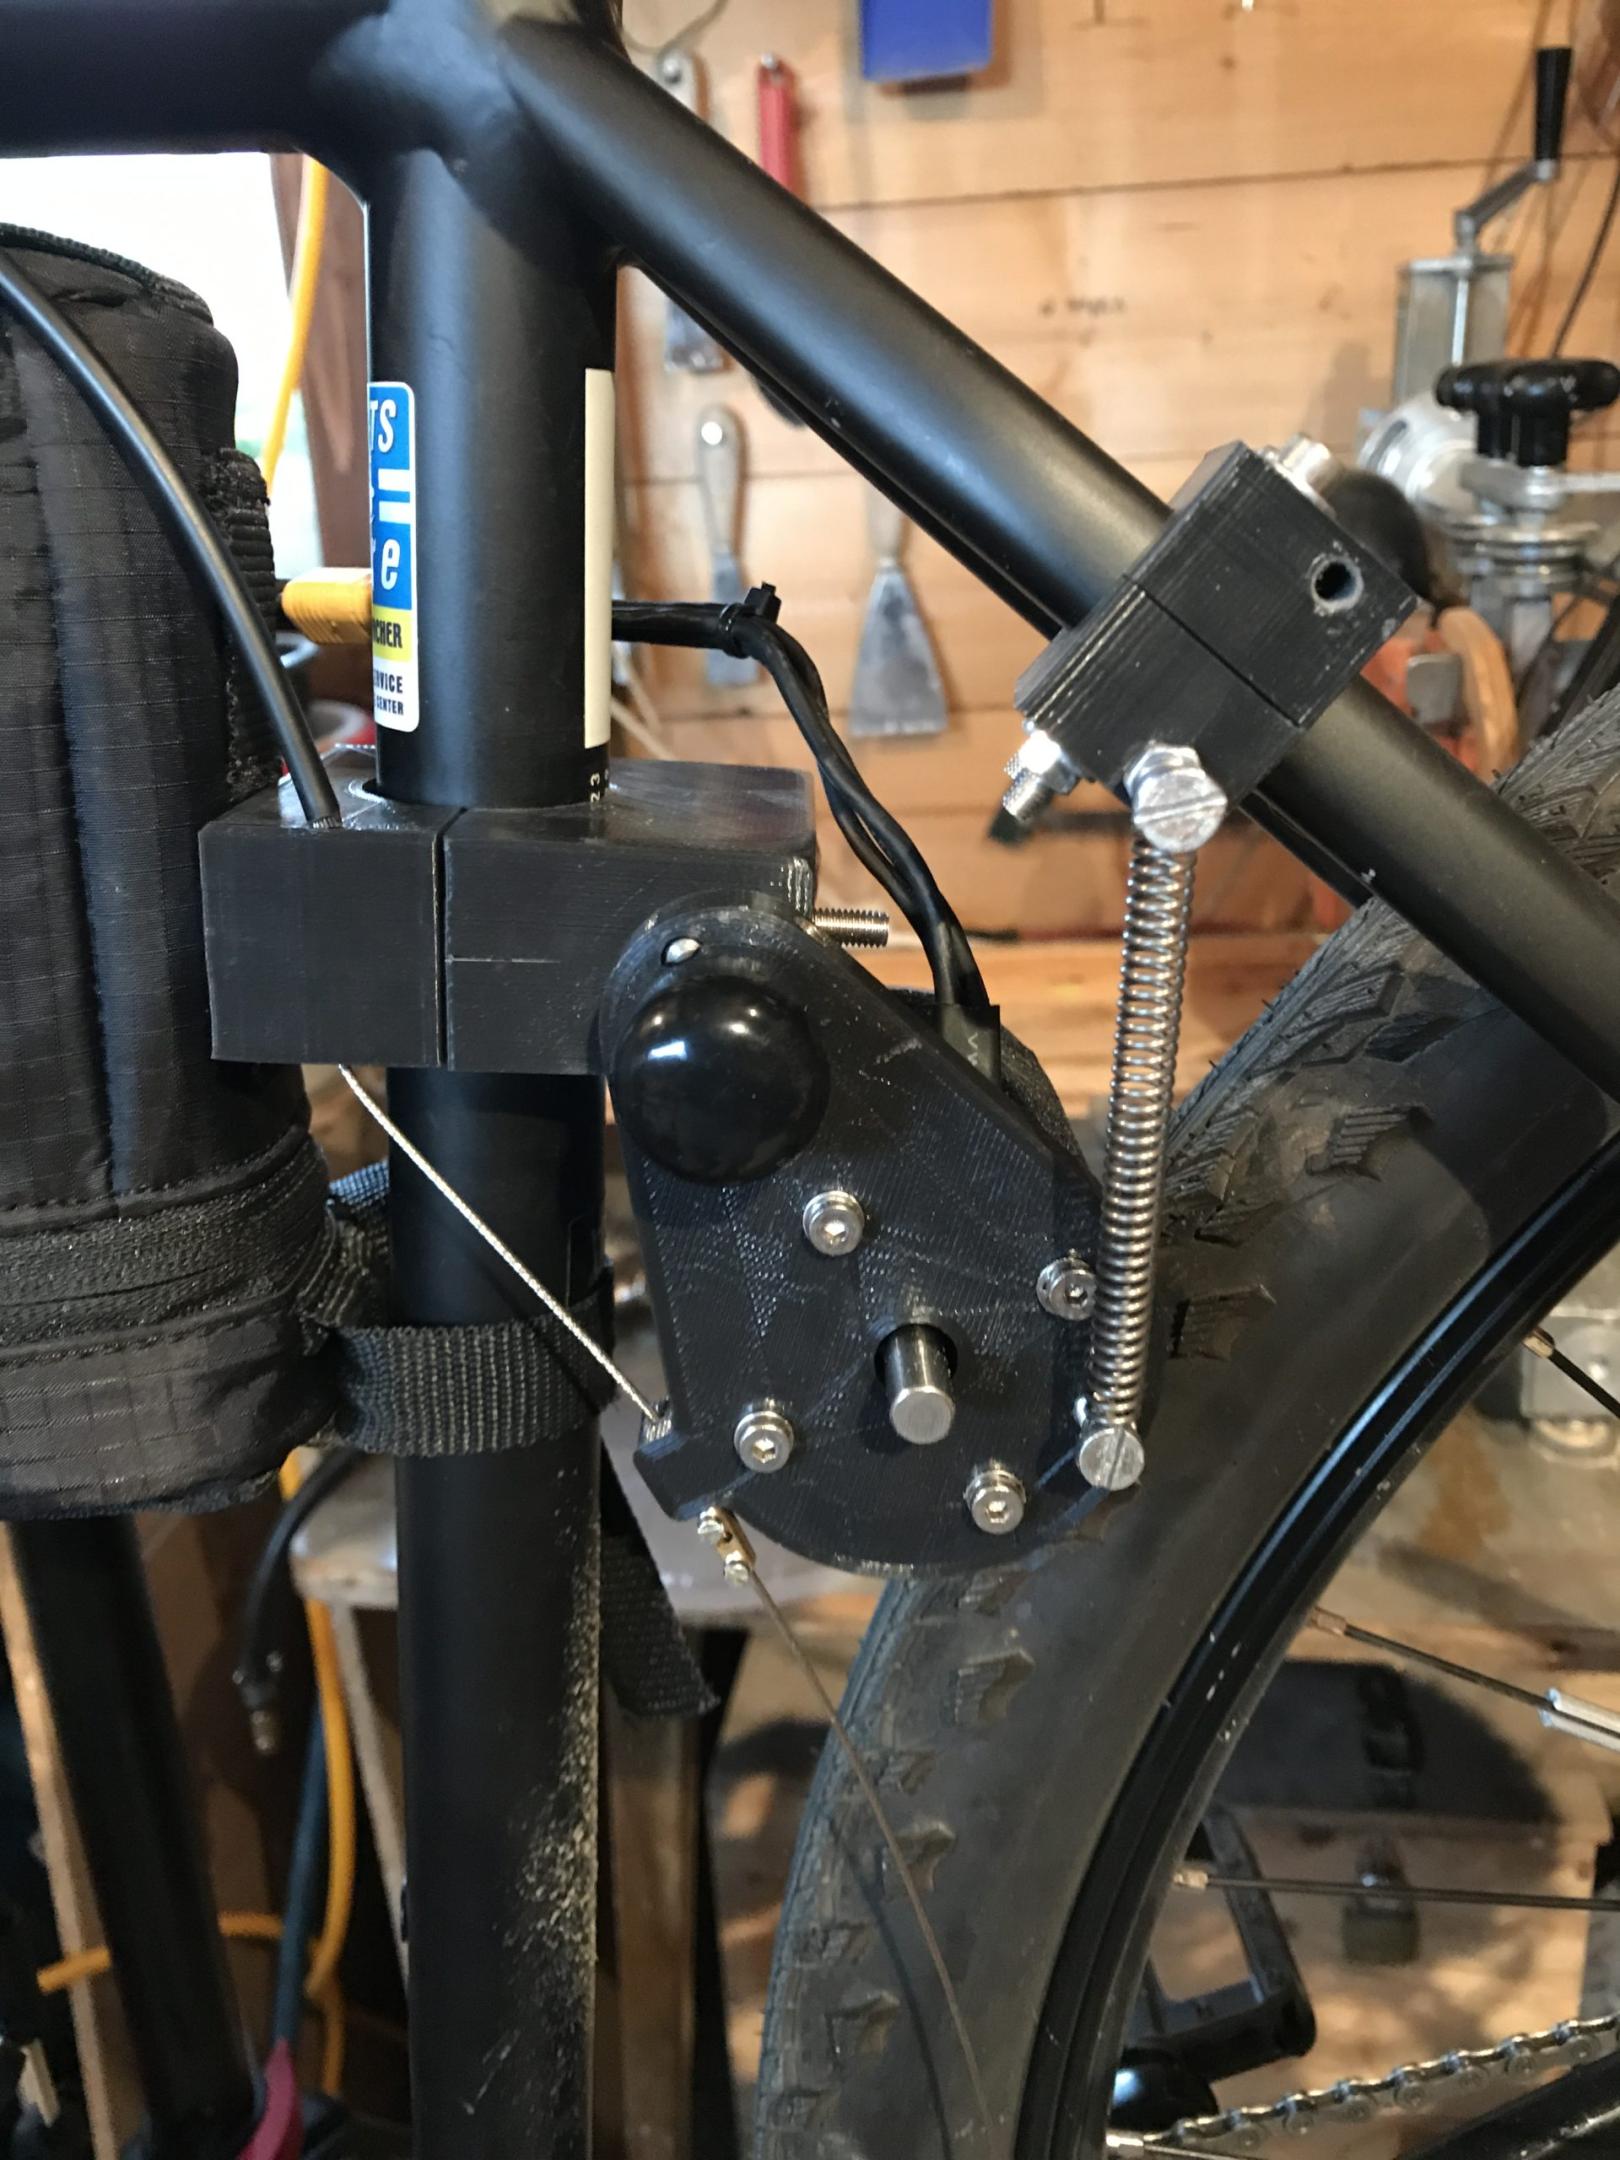
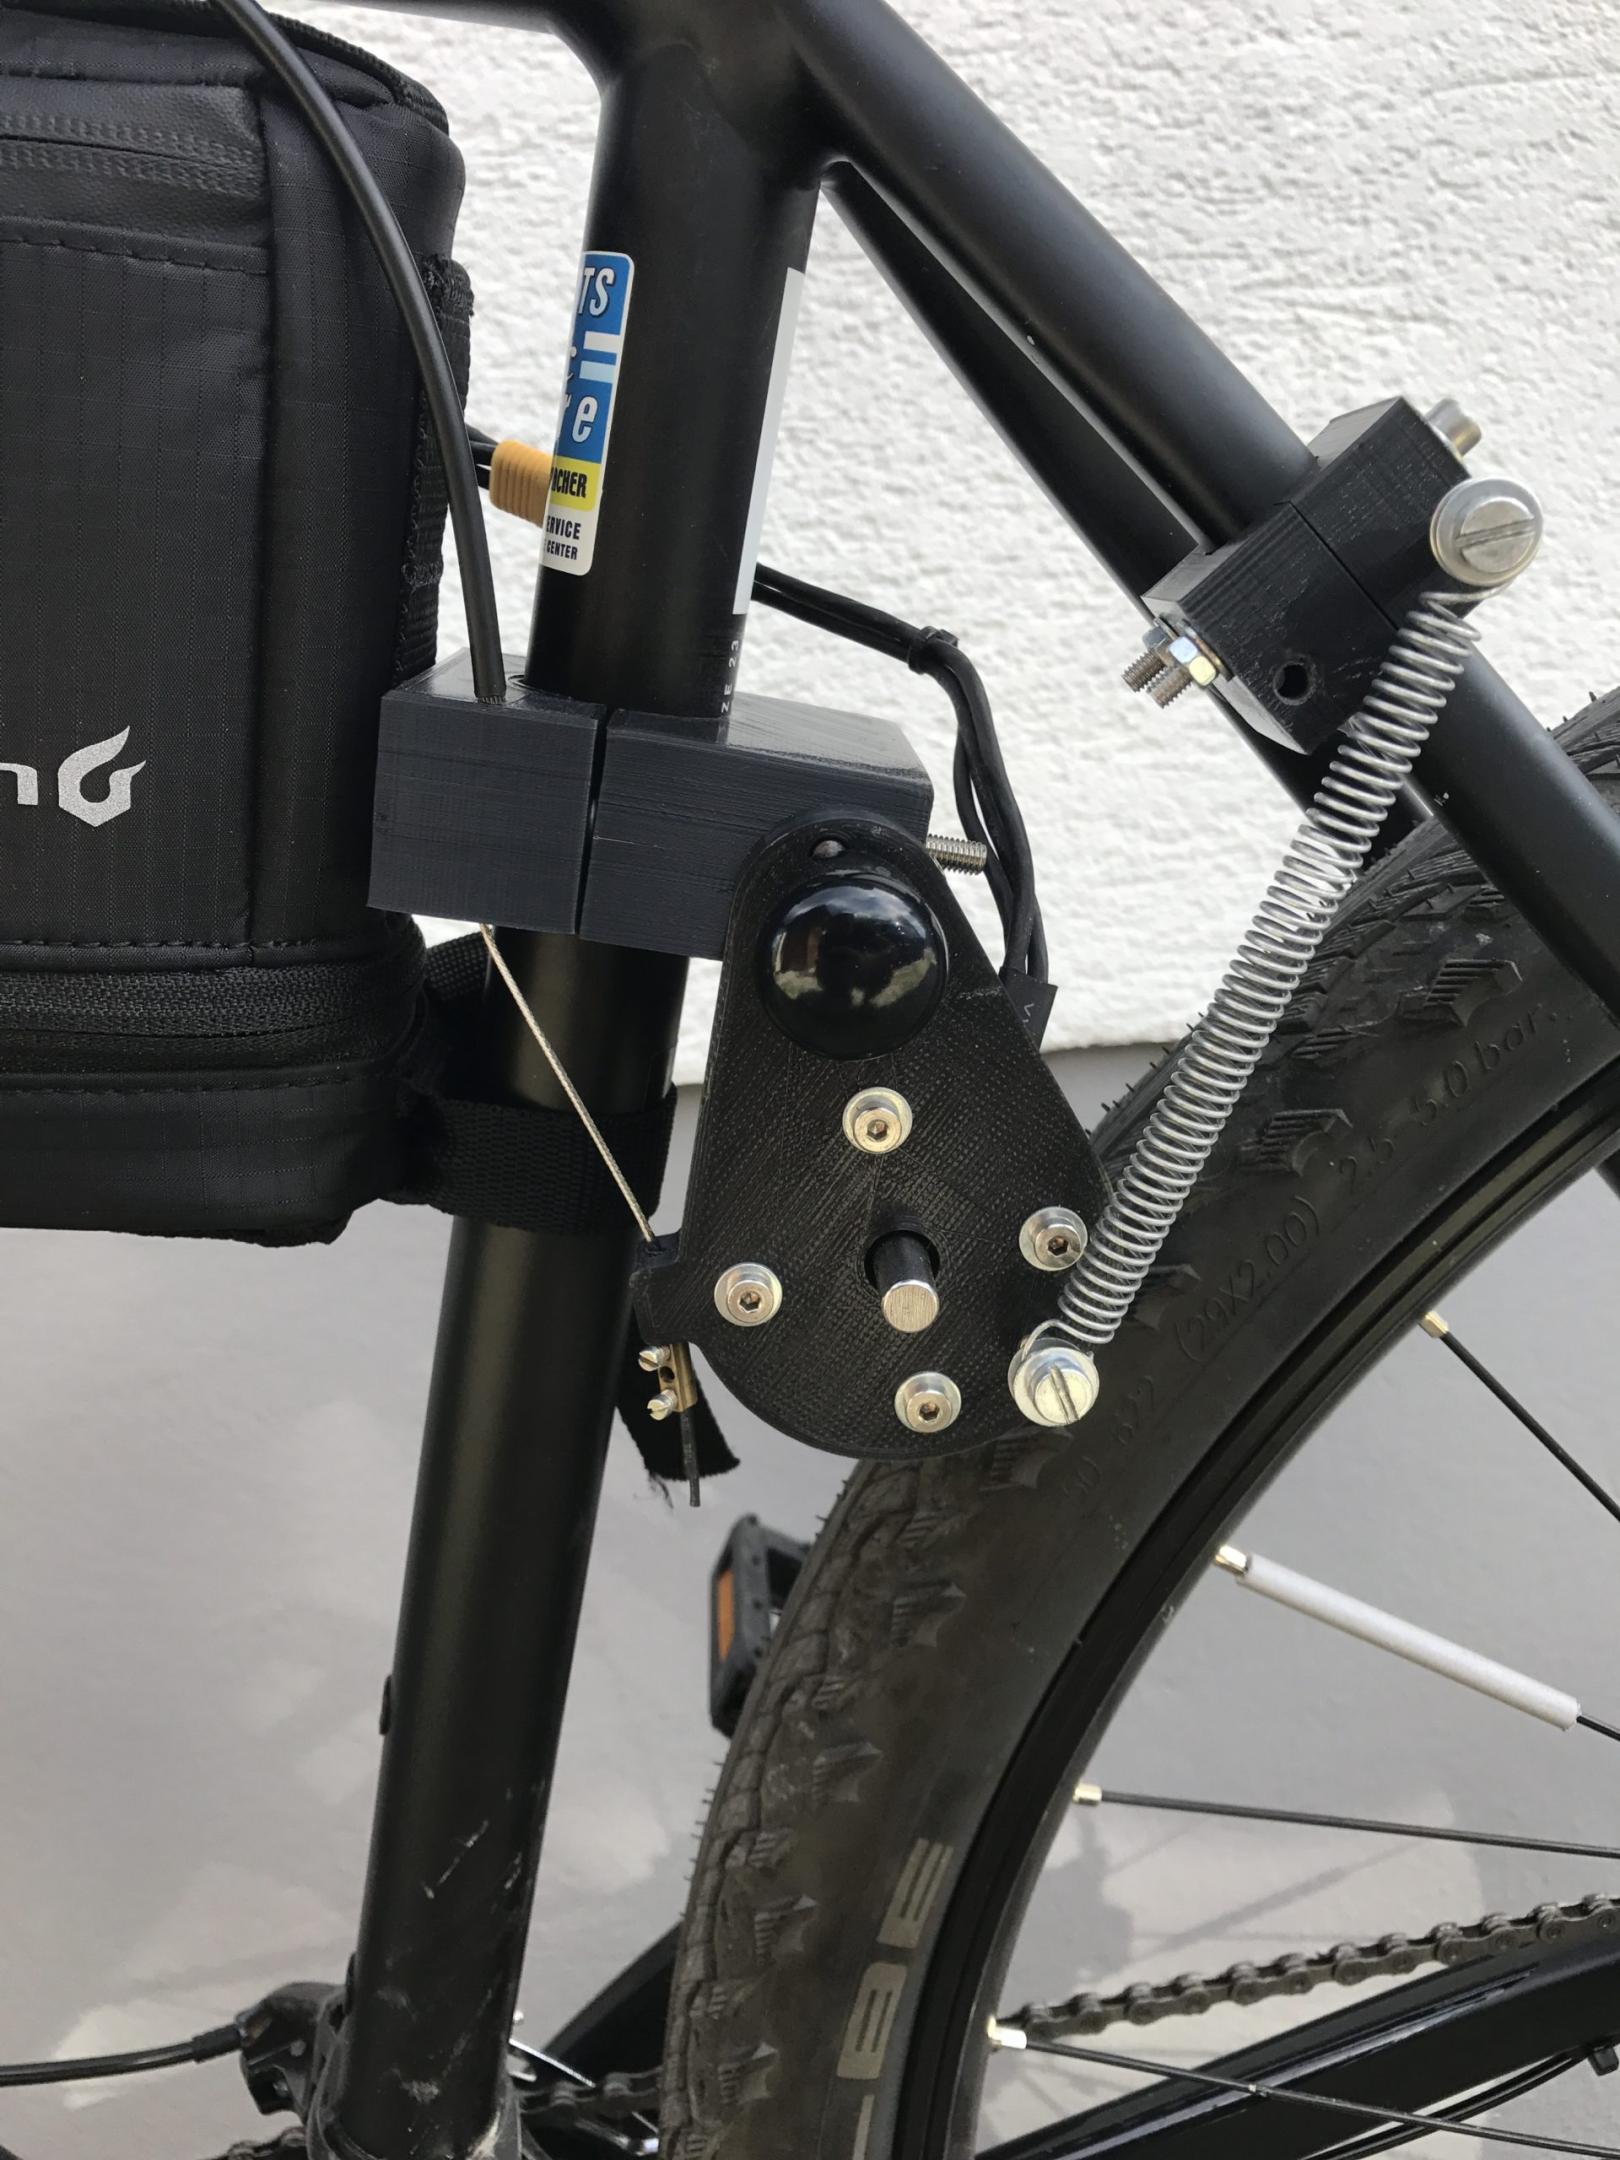
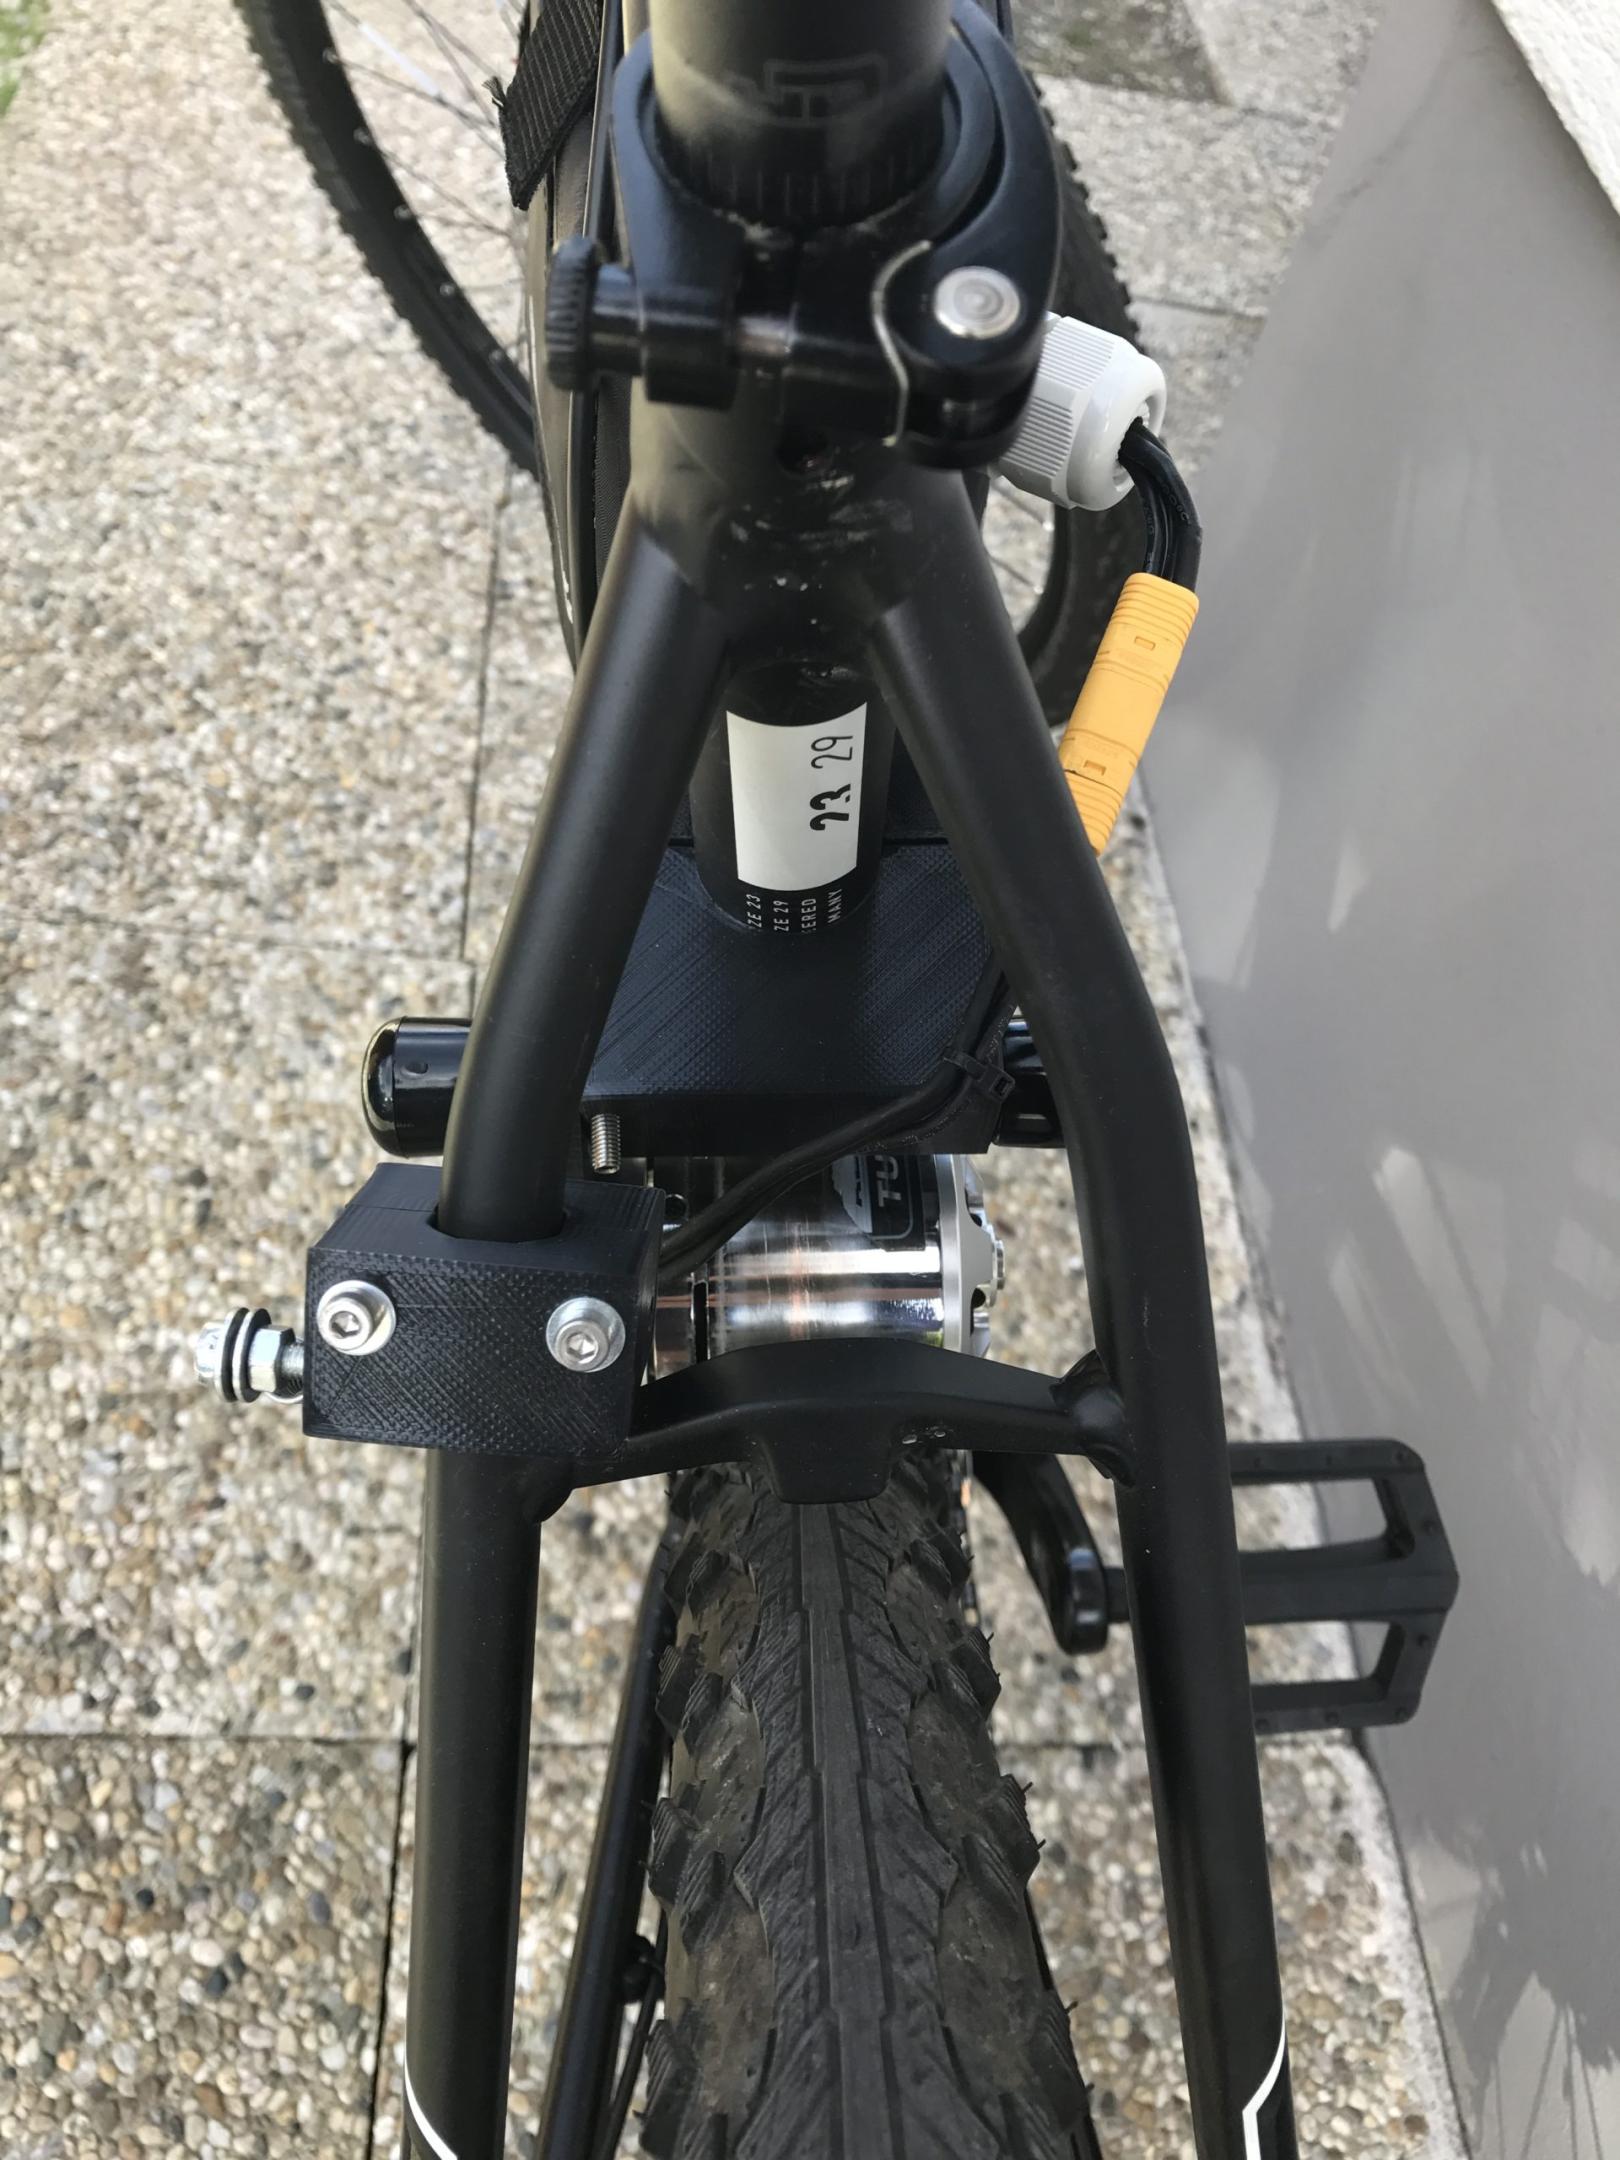
Naturally, once the BLDC motor spins, a momentum is generated which pushes the motor towards the bicycle tire. However, I found the torque transmission to be a little underwhelming this way, maybe my chosen mounting spot or angle was not ideal. To increase the contact pressure between tire and motor, I used a spring mechanism which can be manually activated or deactivated using a bowden cable. So once deactivated, the motor does not make contact with the tire anymore and is completely decoupled.
When using the E-brake input, recuperation is applied. The BLDC motor is now acting as generator and converts kinetic energy of the bicycle into electrical energy which is flowing back into the battery pack.
So the recuperation feature, together with the completely decoupleable motor, the low weight in general of only the bare BLDC motor itself, the FOC motorcontroller and some 3D printed mounting parts make this really interesting.
Laundry list of troubles:
- The torque transmission was not comparable to e.g. some Bosch Ebike motor with gearing.
- A healthy compromise must be found between wheel diameter of the bicycle, BLDC motor diameter and size, motor KV and battery voltage to get a useable setup.
- The mountain bike used for prototyping only had 11 gears and my setup worked best at medium to higher speeds >25 km/h, so I had to pedal like crazy to keep up.
- I am not completely certain on how severe friction drives impact tire life.
- A lot of cables were present at the handlebar (throttle, brake, bowden cable, speed sensor, second bowden for locking front damper etc.) which made it not the prettiest setup.
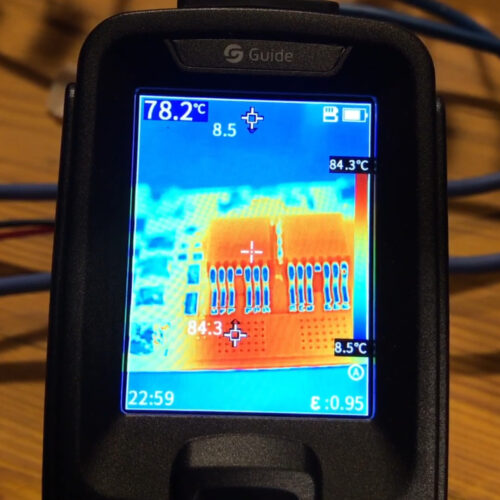
- Regenerative braking occasionally behaved weird, I monitored parameters with my phone by connecting a BLE dongle to the motorcontroller. Sometimes when applying e.g. 20A braking current, there was next to no resistance when turning the motor by hand, but another time at 5A braking current there was significant braking resistance noticeable. This was independent on the charge state of the battery. Also, the braking current is limited by the maximum charge current rating of the battery pack, so either LiPo packs with adequate charge current rating or Li-Ion packs with many branches paralleled are preferable (also good to prevent voltage sag during acceleration). Braking also must be applied with feeling to prevent locking the motor and the tire rubbing against it. This also happens if the applied braking current is too large.
- This setup is only good at dry conditions and puddles should be avoided.
- There was no torque sensor or anything to determine the appropriate motor support, it behaved like an electrical scooter with gas and brake input.
- Ideally, tires with next to no profile at the contact area between motor and tire should be chosen. I used Schwalbe Hurricane Performance 29×2.0. They have at least some profile at the sides, so it doesn’t look that weird when mounted on a mountainbike.
Pictures


I decided to continue to use my conventional Ebike with Bosch motor, therefore disassembled everything and sold the bicycle used for this prototype and also individual parts to get money for upcoming projects.